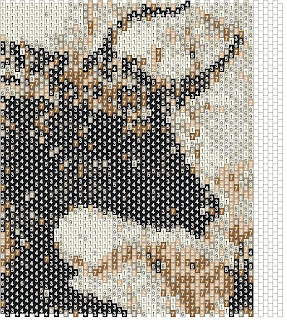
 Instead of relying on your program to create the pattern, use your cursor to paint in the blocks of colour. With this pattern, I got the blank grid in place, then started with the strong black colour, and focused on getting an outline. You can see that step here:
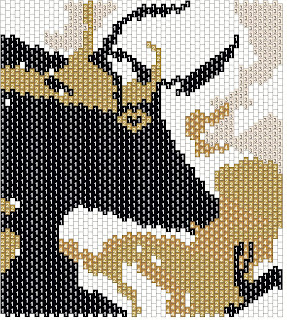
 Once I had the areas of black outlined, I filled them in using the paint bucket "fill function." Here is where the pattern now stands:
I then started to add the next colour.
 And the next.
 At this point, I have something very similar to the finished piece. Because I ended up redoing the pattern from scratch to illustrate the technique, it isn't exactly the same so far. Still, for something I did quickly, it already has a nice strong image to work with. From this point on, it will need one or two more colours and some clean up, but the pattern is much nicer than anything you would get if you just relied on the program. Even if you were to take the program created pattern and carefully re-edit and clean everything up, it may or may not look as nice. Now that I have been using this technique for some time, I find it is much quicker and easier for me.


2 comments:
Thanks for helping de-mystify bead designing!! It's fun to read how this stuff works...
--Dave
at Rings & Things
Wonderful information, Ginger. This is exactly what I have started doing recently.
Post a Comment